Dispatch Center |
|

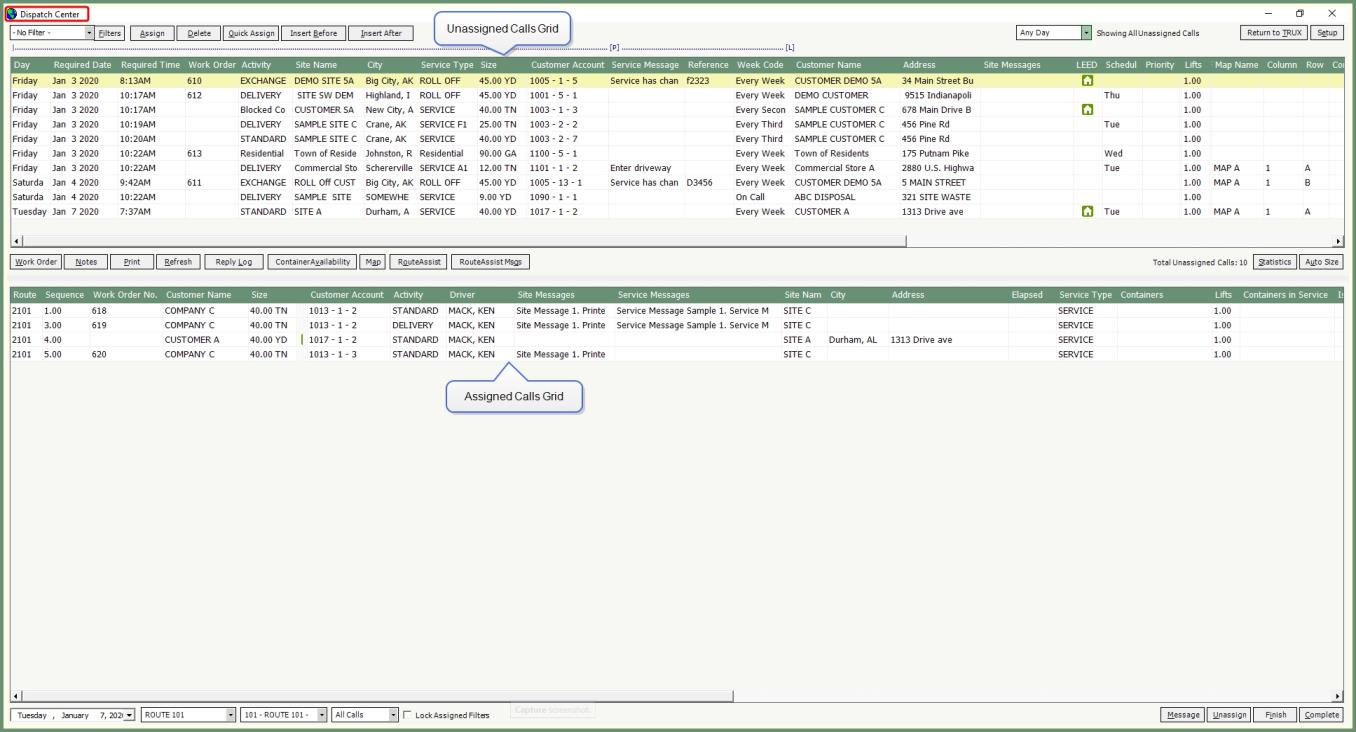
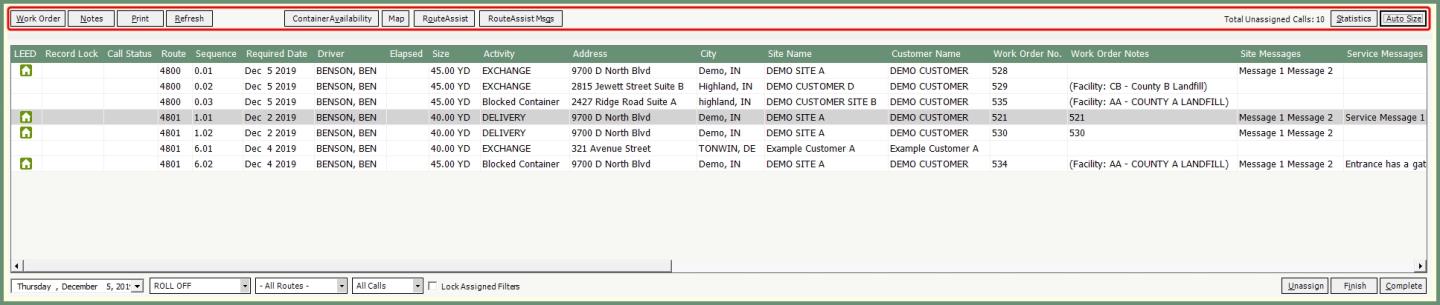
Dispatch Center is used to dispatch unassigned scheduled calls onto routes. Dispatch Center is divided into three toolbars and two main grids; Unassigned and Assigned. Dispatch Center provides the functionality to assign calls to routes, move calls between routes, record completed work, modify/delete calls as well as facilitate communications between your dispatchers and route drivers by notifying drivers of assigned work using messages and/or Route Assist. Also see Related Topics.
|
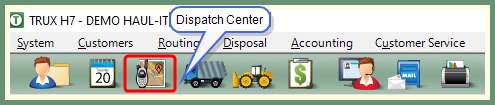
Dispatch Center Navigate To: Routing>Dispatch Center |
Shortcut Click the radio/map button from the green banner
|
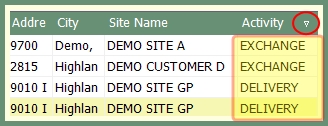
Buttons in the unassigned toolbar are used to perform maintenance and assign functions on calls in the unassigned grid. Calls in the unassigned grid have been created using Schedule Call-In which were not assigned to a specific route.
Grid Preferences:

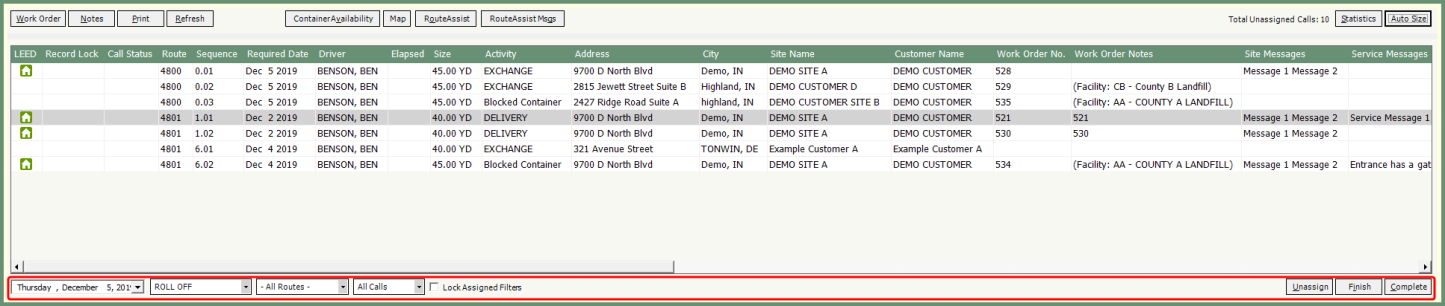
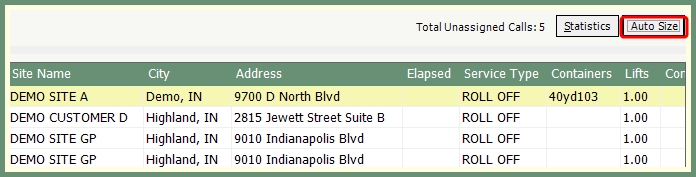
- Unassigned Calls will default to Show All Unassigned Calls. Select the drop down to change the preference day or this week.
- Columns can be resized, sorted and rearranged.
- Click Auto-Size to reset the column sizes to fit the current size.
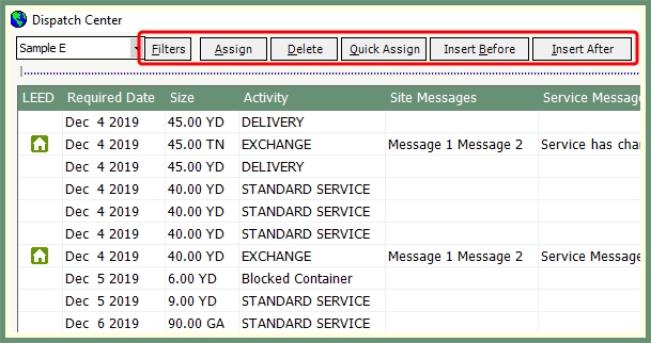
Filters: Customizable per user unassigned grid viewing options. See more in the Dispatch Filters topic.
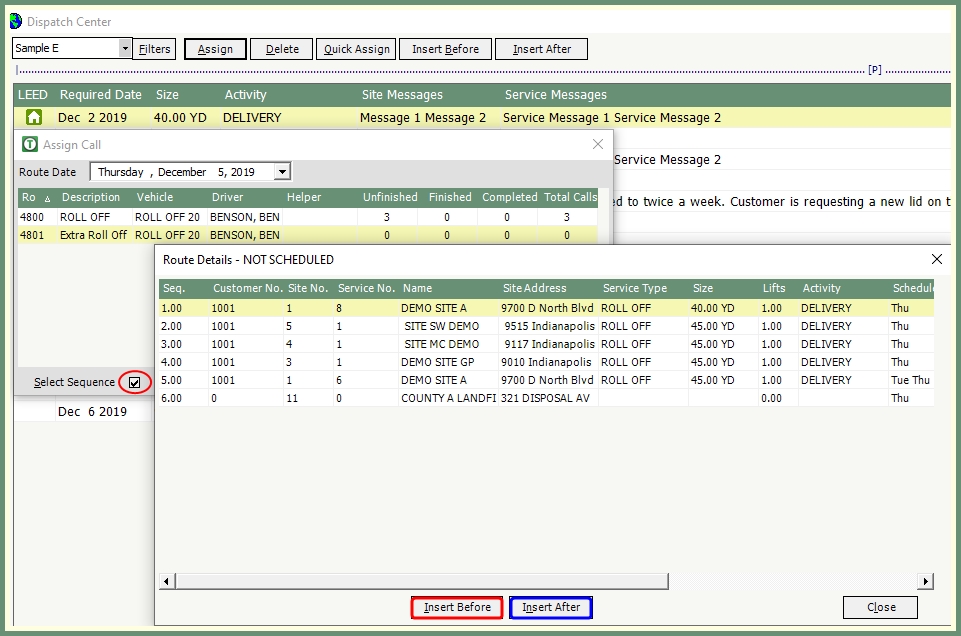
Assign: Opens the Assign Call window to assign the selected unassigned call to a route.
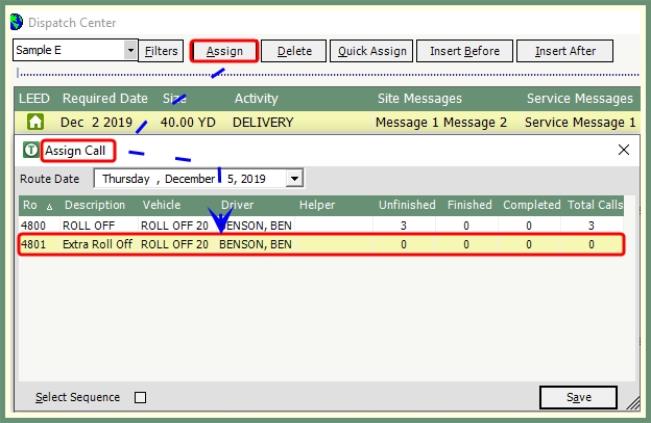
- Verify or select the Route Date for this call.
- Select a Route to assign the call to.
- To apply the call to the company default first or last sequence, click Save.
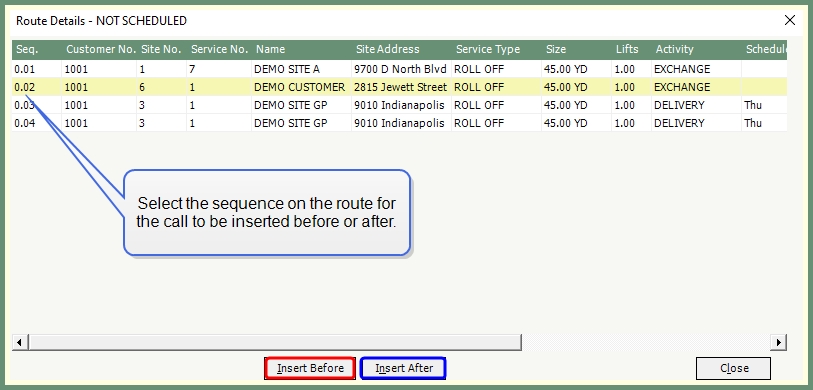
- To specify the sequence, click Select Sequence.
- Select the existing sequence to assign the call before or after.
- Click Insert Before or Insert After.
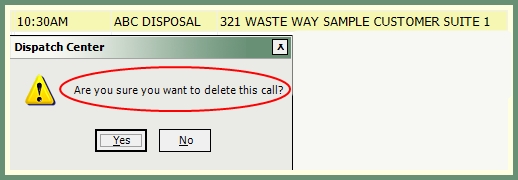
Delete: Deletes the selected unassigned call.
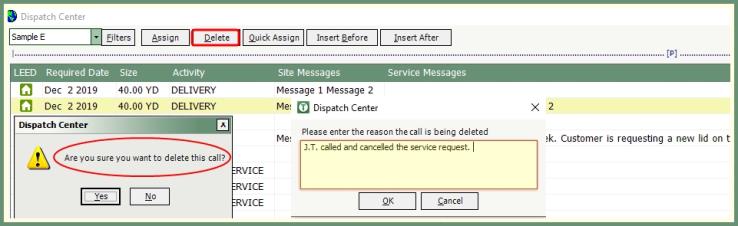
- Select an unassigned call.
- Click Delete and confirm delete message.
- Enter delete reason and click Ok.
Quick Assign: Assigns the selected unassigned call to the recalled route in the assigned grid.
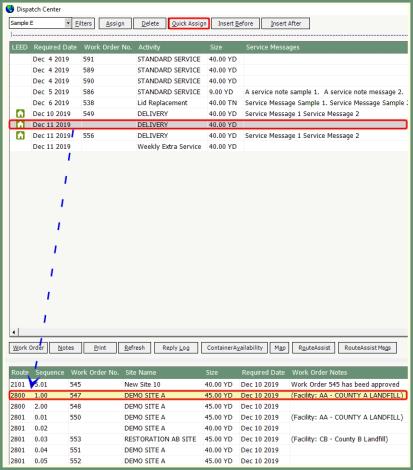
- Recall the route from the assigned grid to quickly assign unassigned calls to.
- Select a call from the unassigned grid.
- Click Quick Assign.
Insert Before: Inserts the selected unassigned call before a selected assigned call sequence on a route in the assigned grid.
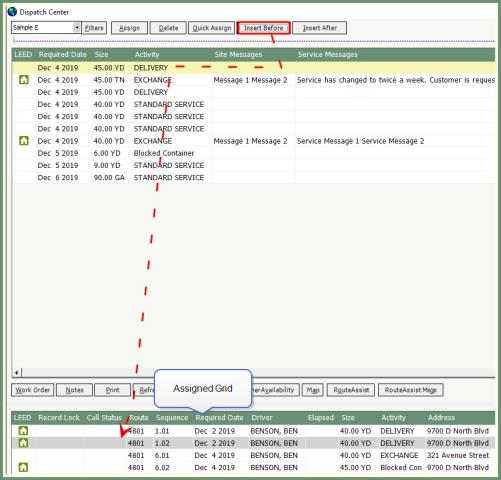
- Recall the route from the assigned grid to insert the unassigned call to.
- Select a call on the assigned route to insert the unassigned call before.
- Select the unassigned call from the unassigned grid.
- Click Insert Before
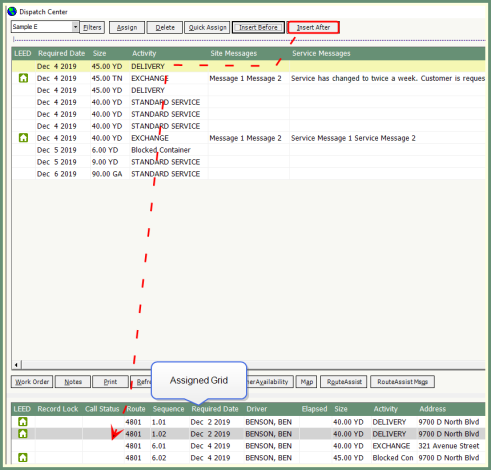
Insert After: Inserts the selected unassigned call after a selected assigned call sequence on a route in the assigned grid.
Buttons in the center toolbar are used to perform shared functions for both the assigned and unassigned call grids.
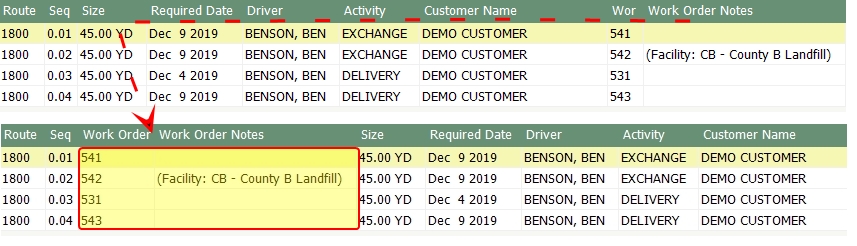
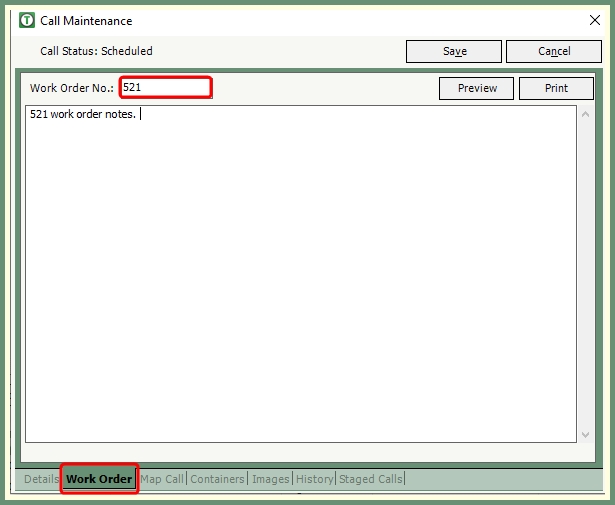
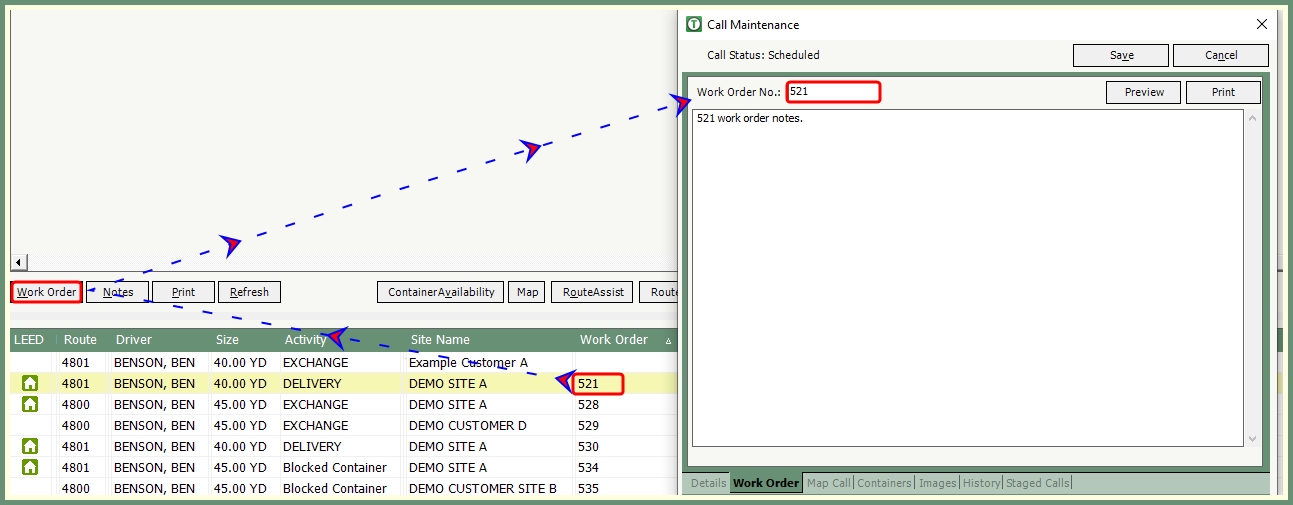
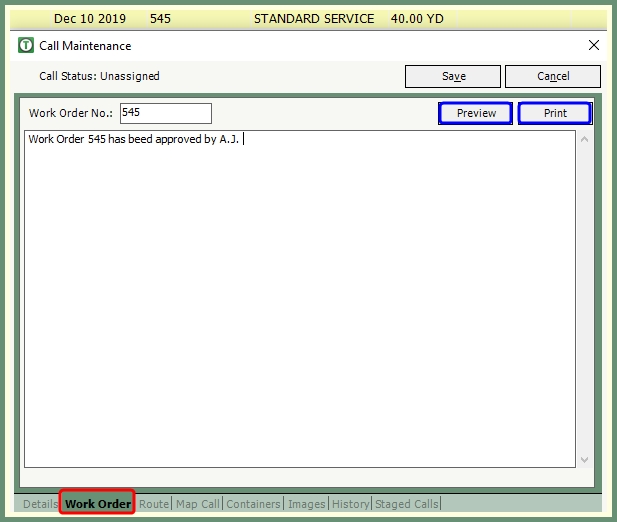
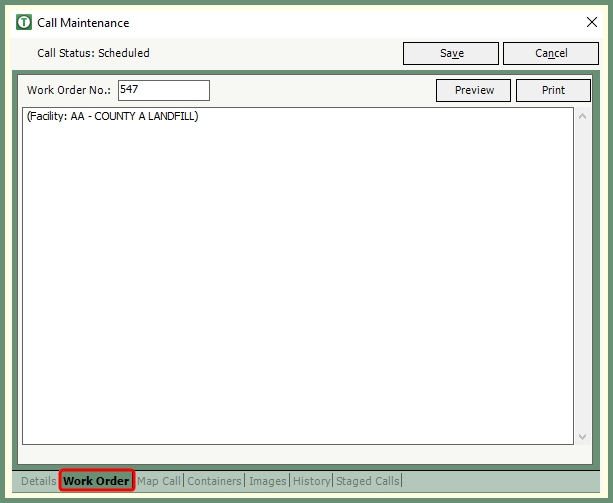
Work Order: Opens the work order tab in call maintenance to review, modify, print or preview the associated work order to the selected unassigned or assigned call.
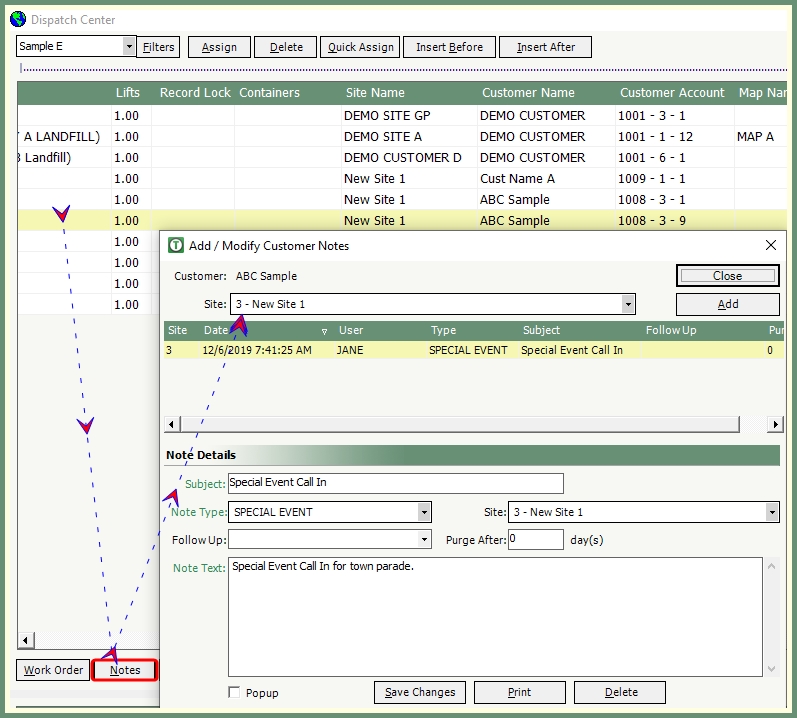
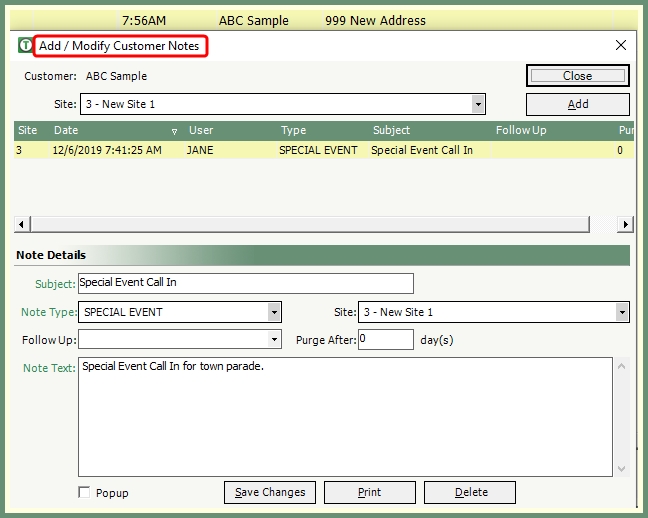
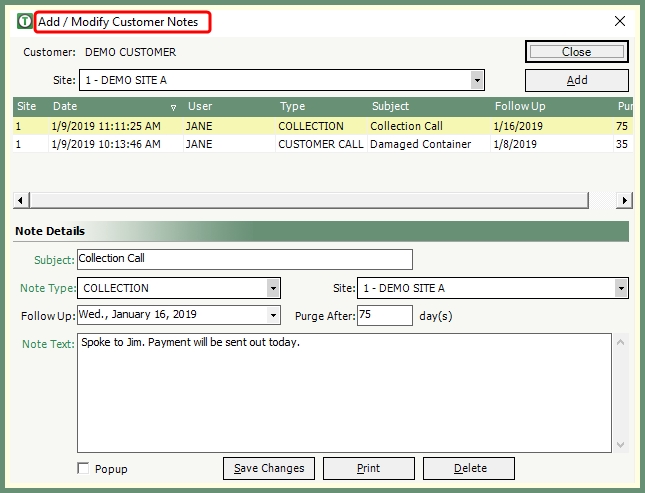
Notes: Opens the Add/Modify Notes window to review, modify, add or print associated notes with the selected unassigned or assigned call.
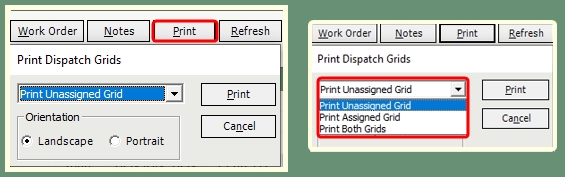
Print: Prompts to print the Unassigned, Assigned or Both grids with the option to print landscape or portrait orientation.
Refresh: Updates unassigned and assigned grid calls and call status.
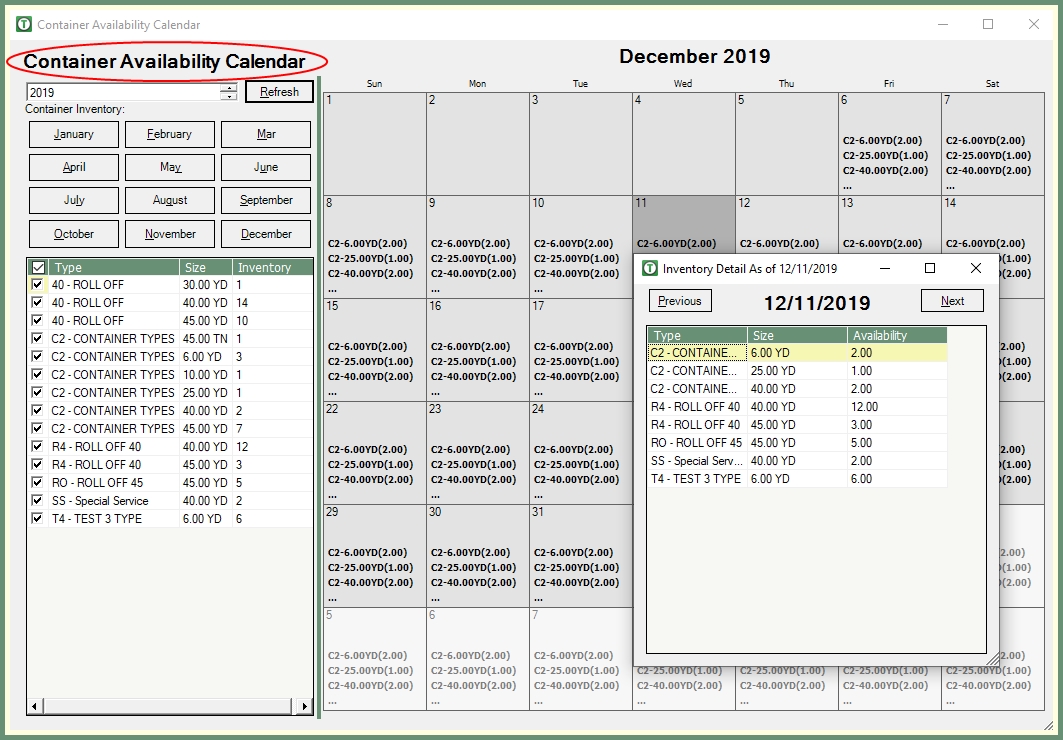
Container Availability: Opens the Container Availability Calendar. View of container inventory by year, month, container types with inventory detail by specific date within the calendar.
Map: Opens the map for selected route/call in either the unassigned or assigned route.
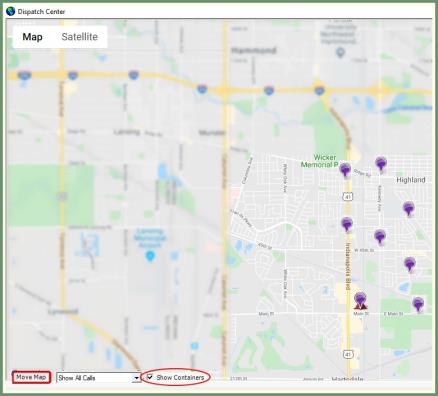
- Button changes to Hide Map when the map is open. Click Hide Map to close the map view.
- Select Move Map to flip the map view between the assigned and unassigned grid.
- Click Show All Calls drop down to show only Unassigned or Assigned calls.
- Click Show Containers to include container pins on the map.
- Optional GPS view by all trucks, no truck or specific truck.
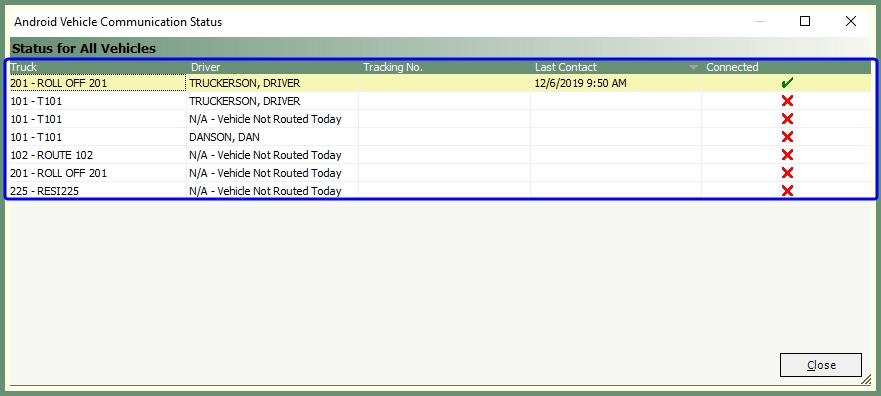
RouteAssist: Displays the status of Android Tablet connectivity by vehicle and driver.
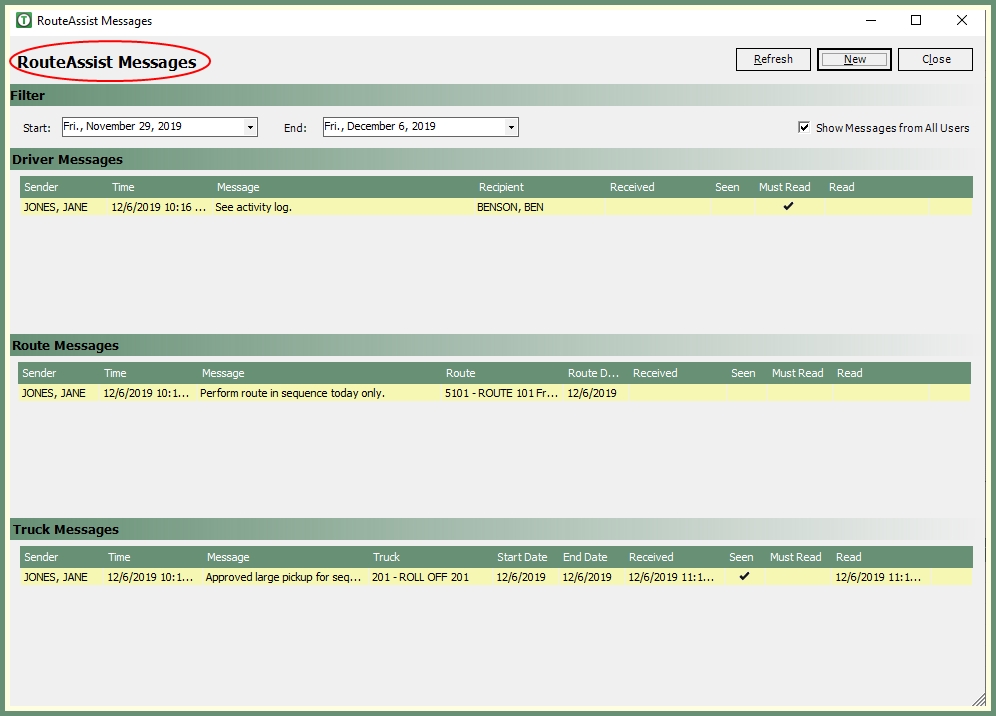
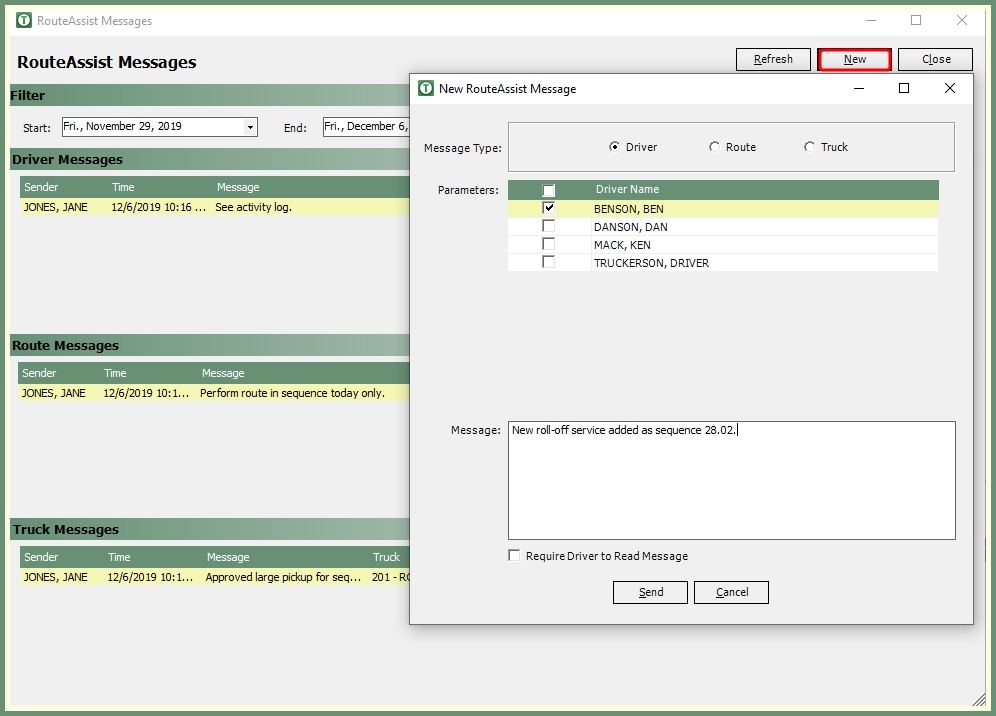
RouteAssistMsgs: Opens the route assist messages and displays the existing messages by driver, route and truck filtered by date and users.
- Click New to send a new message to the driver, route or truck.
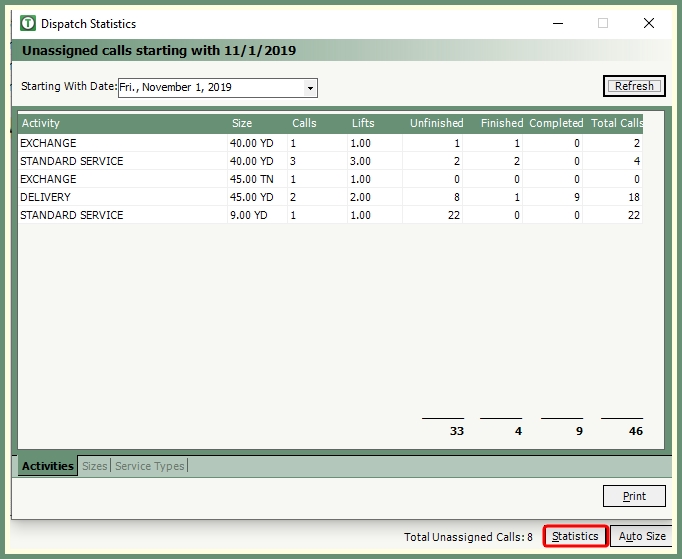
Statistics: Opens Dispatch Statistics filtered by date and grouped by activity.
Auto Size: Resets the columns sizes to their original size.
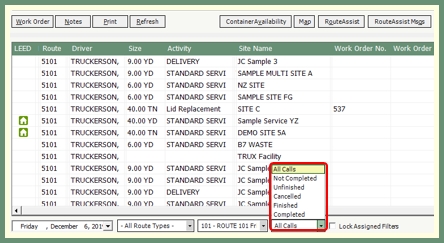
Buttons in the assigned toolbar are used to perform functions for scheduled routes and assigned calls. The lower grid is used to display assigned calls which have been placed on routes awaiting completion. The grid columns, in both grids, can be sorted and reordered to organize and display call information in a meaningful and efficient manner.
To Populate Assigned Calls Grid:
- Select route date, specific or all route types, specific or all routes and all calls or calls by status.
Lock Assigned Filters: Locks the route selections made for the assigned grid.
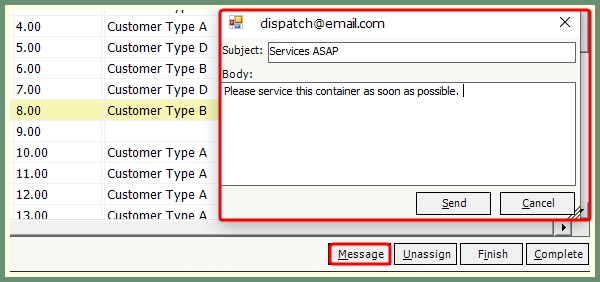
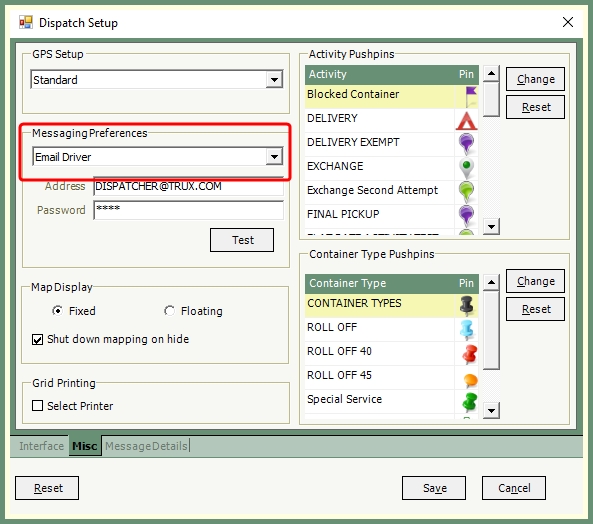
Message: Sends an email message to the driver or truck based on the Dispatch Setup Message Preferences for the scheduled route regarding the selected call in the assigned grid.
Unassign: Changes the status of an assigned unfinished call to unassigned.
- The call will be moved to the unassigned grid.
- Assigned calls with a finished, in progress or complete status cannot be unassigned.
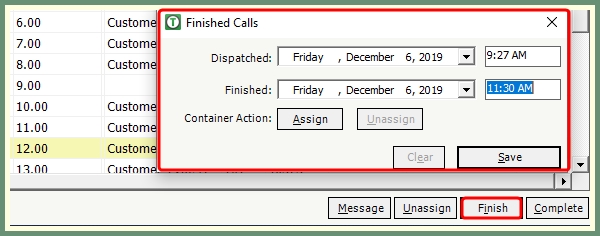
Finish: Changes the status of an assigned unfinished call to Finished.
- Select the unfinished call from the assigned grid.
- Click Finish and update the dispatched date and time.
- Assign or Unassign containers as applicable.
- Click Save.
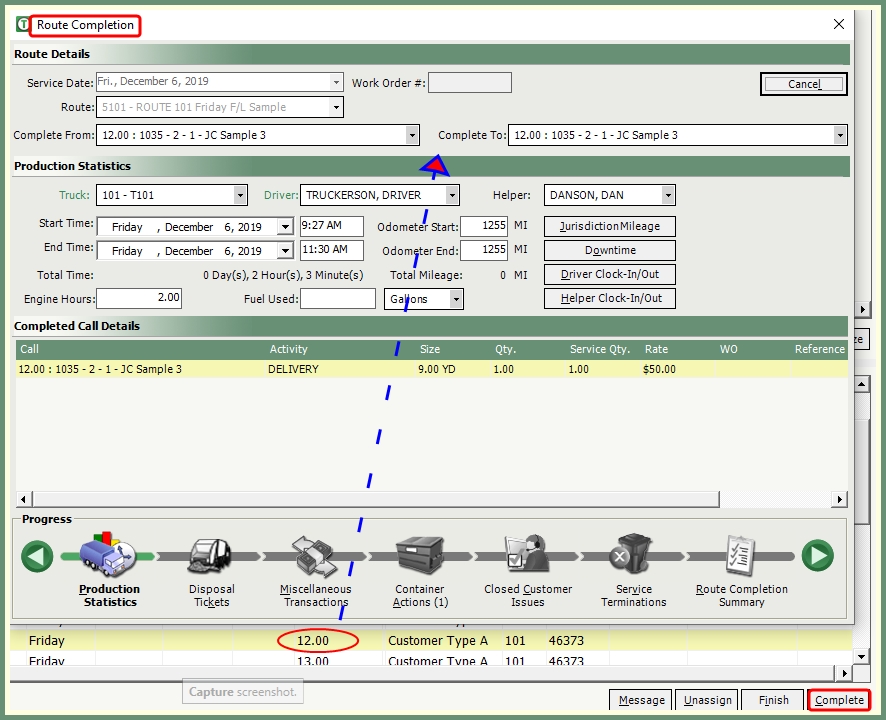
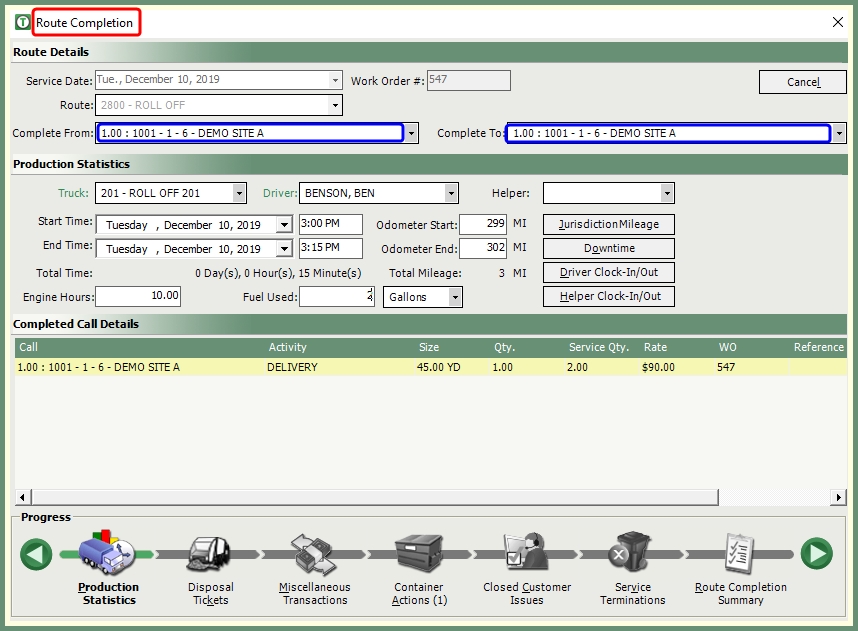
Complete: Opens the route completion window for the selected assigned call.
- See more in our Complete Route topic.
Dispatch Center is divided into two main grids; Unassigned and Assigned. Each grid offers actions for each service call based on the routing status.
A Schedule Call-In which has not yet been placed on a route, will populate the unassigned grid awaiting action. A column exists in the unassigned grid for all necessary call and service details which will populate accordingly.

Grid Preferences: Columns can be resized, sorted and rearranged.
- Click Auto-Size to reset the column sizes to fit the current size.
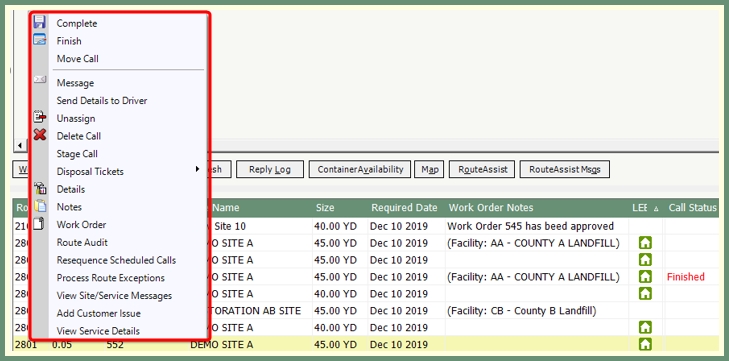
Unassigned Right Click Menu

Assign: Places the unassigned call on an route.
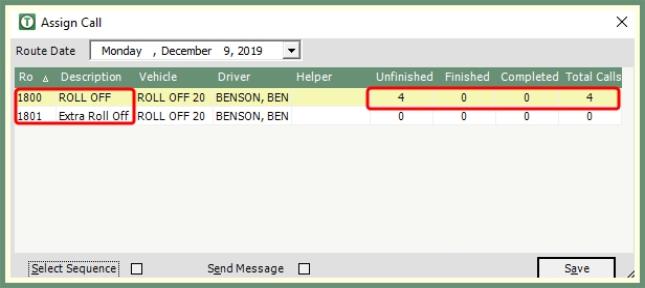
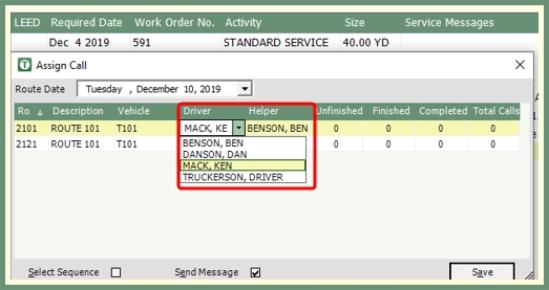
- Available routes for the service type will populate the Assign Call Grid and summarize current route call status.
- Verify or select the route date.
- From the grid, select an available route to place this call.
- The driver and helper can be changed from the respective drop down.
- The call will be placed on the route according to the Company Settings unless the Select Sequence is selected.
- Send Message will deliver an email message to the driver on the route.
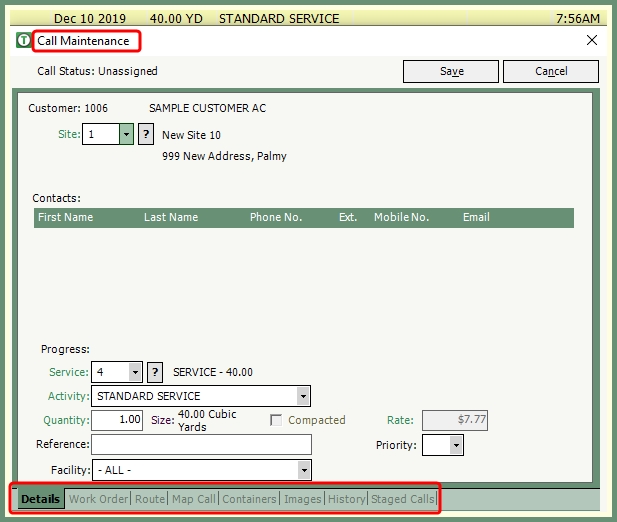
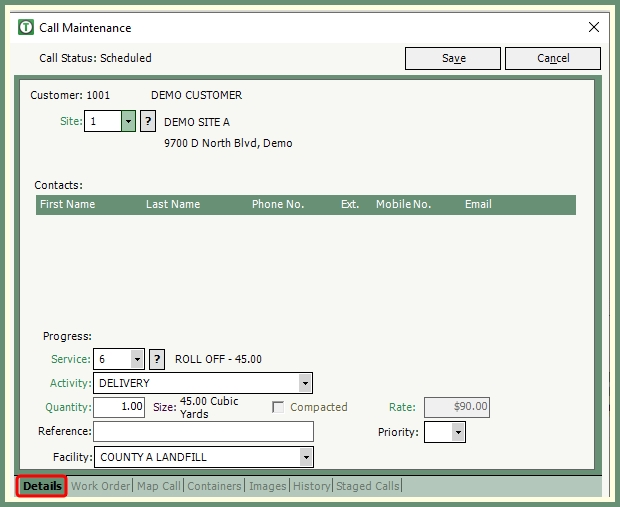
Details: Opens Call Maintenance to view and/or modify call details.
- Modify service, activity, lifts, etc...
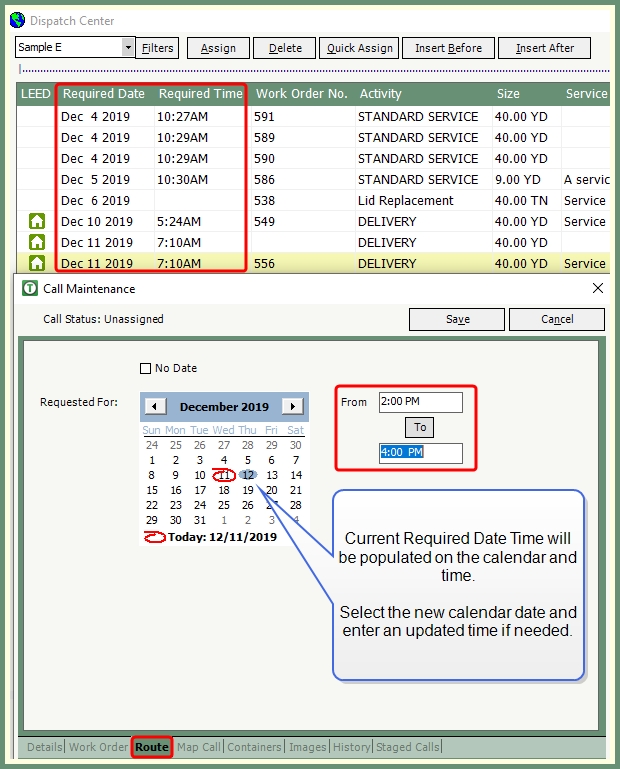
- The call Required Date can be changed in the Routing tab as an alternative to deleting a call.
Work Order: Opens call maintenance Work Order to be previewed, printed or modified.
Notes: Opens Add/Modify Customer Notes for the call in service.
Delete Call: Removes the scheduled call.
- As an alternative to deleting a call, the Details menu allows for call changes such as service, activity, lifts, required date & time.
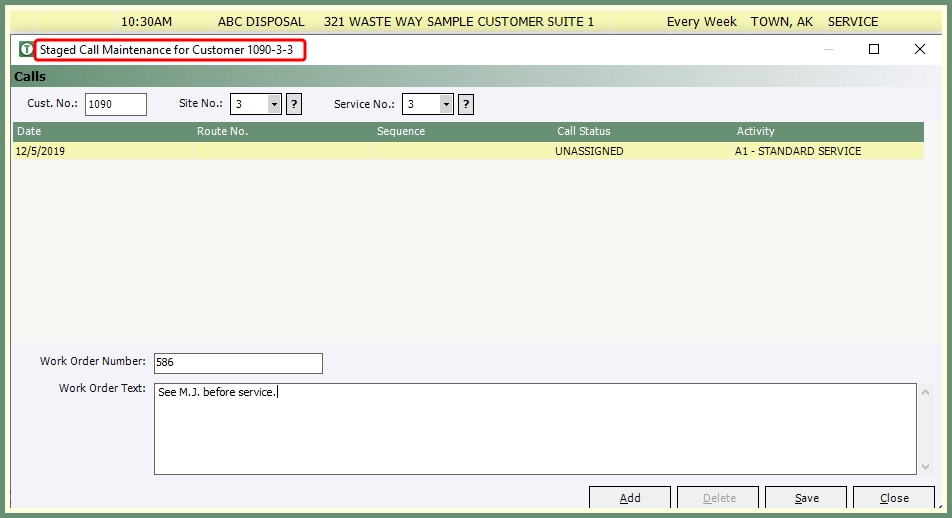
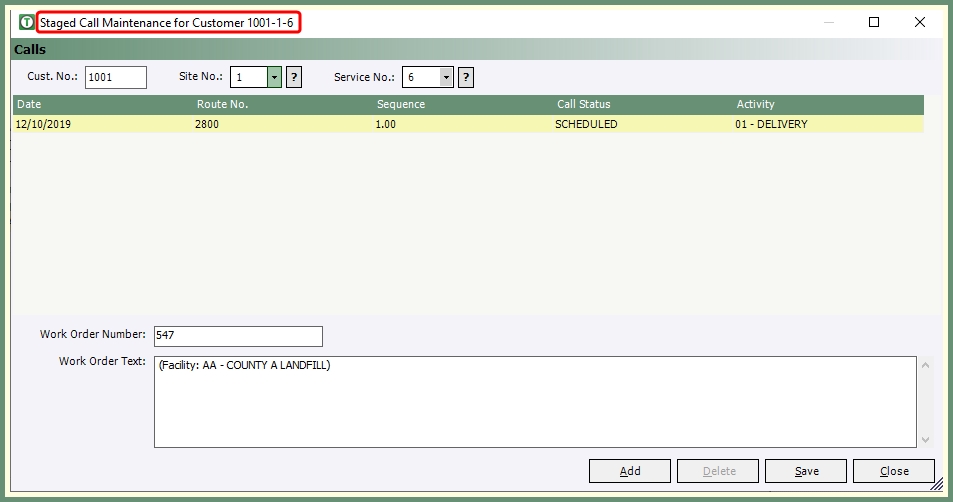
Stage Call: Opens Staged Call Maintenance to view, add or delete a staged call.
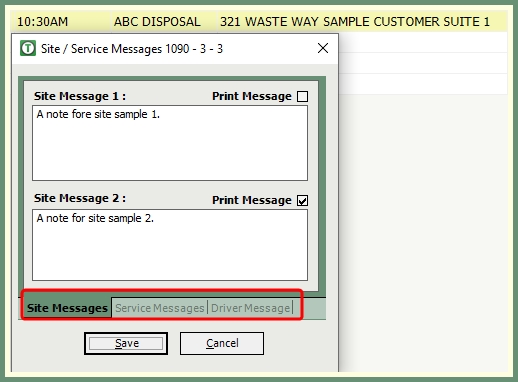
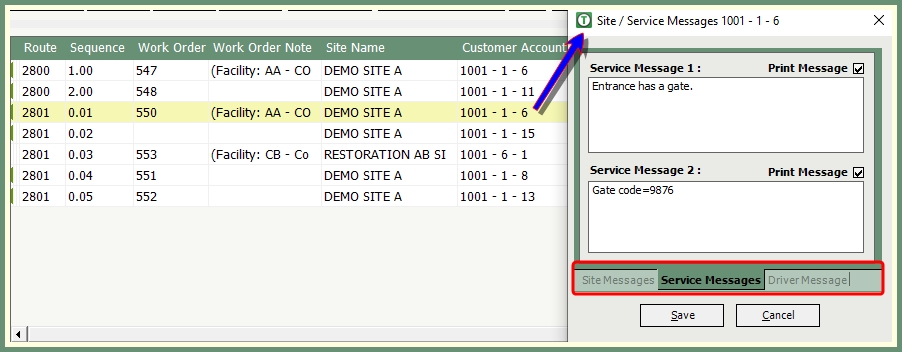
View Site/Service Messages: Opens Site/Service Messages to view and/or edit existing site, service and driver messages.
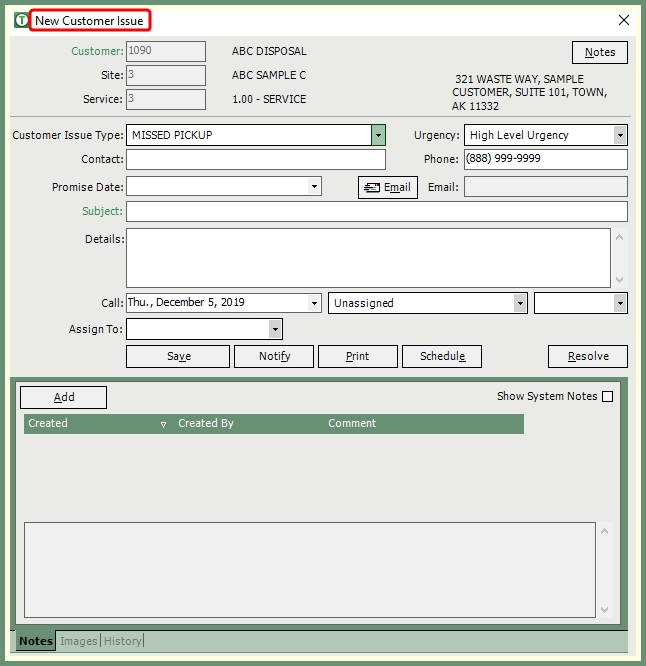
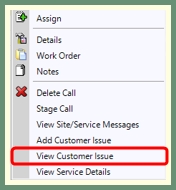
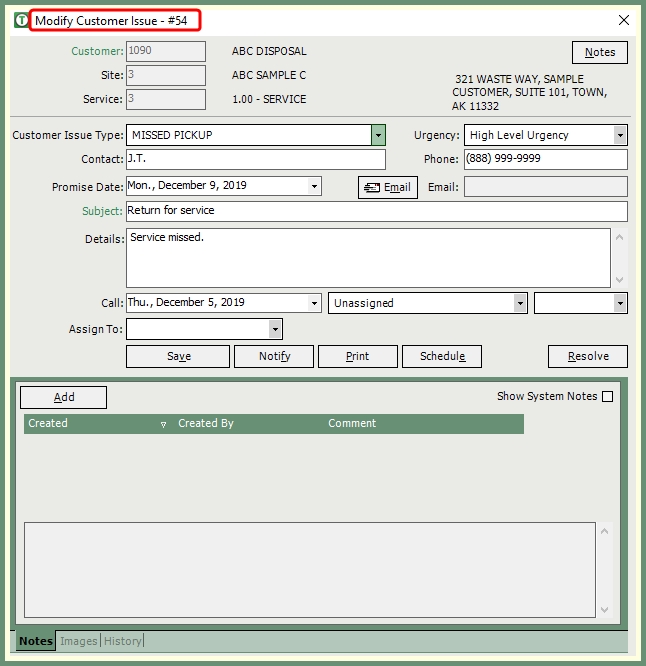
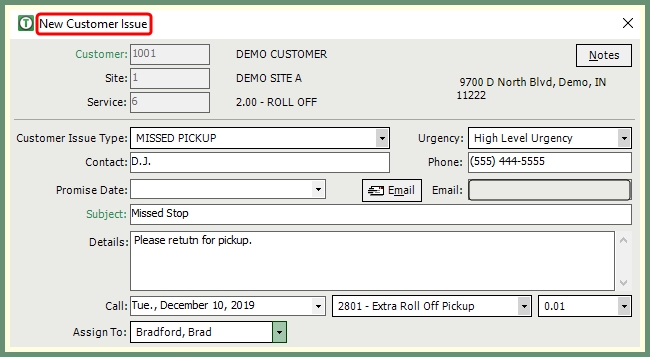
Add Customer Issue: Opens New Customer Issue to be added for the selected service on the unassigned call.
- If the service has existing issues, the option to View Customer Issue will exist in the menu to open and modify customer issue.
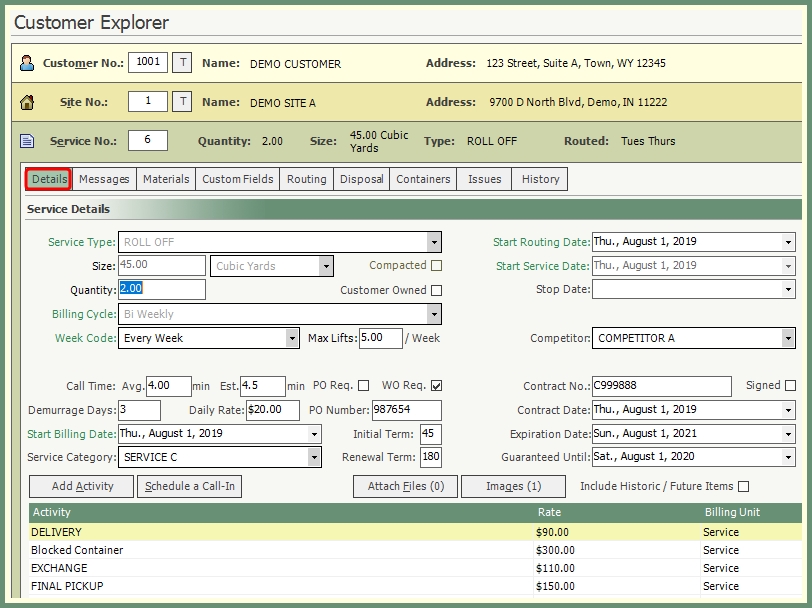
View Service Details: Opens customer explorer Service Details for the selected unassigned call.
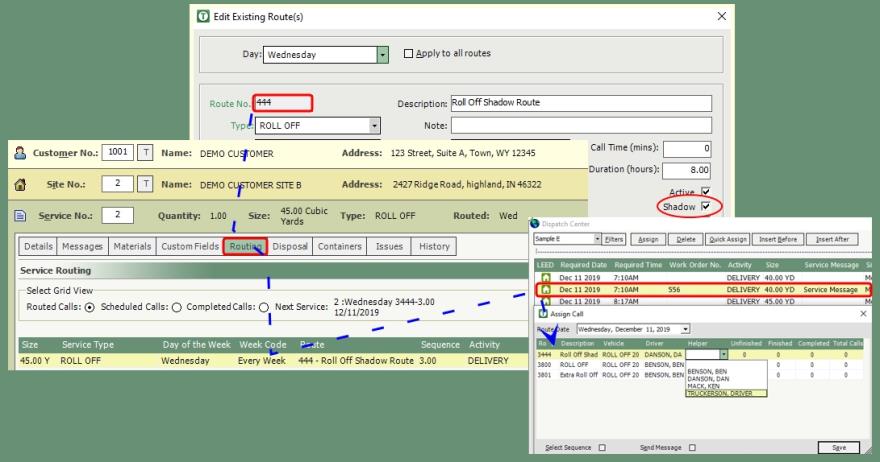
Scheduled Calls On A Shadow Route
Roll-Off services routed on a Shadow Route will place the calls in the unassigned grid once the route is scheduled so the calls can be assigned through dispatch to the appropriate route/driver.

Grid Preferences: Columns can be resized, sorted and rearranged.
- Click Auto-Size to reset the column sizes to fit the current size.
Complete: Opens the route completion window for the selected assigned call.
- See more in our Complete Route topic.
Finish: Unfinished calls from Route Assist can be finished within Haul-It.
- Right click on an unfinished call in Route Center or Dispatch.
- Enter Finished Date/Time.
- Complete necessary Container Actions.
- Click Save.
Unfinish Call: Reverses the Finished Status.
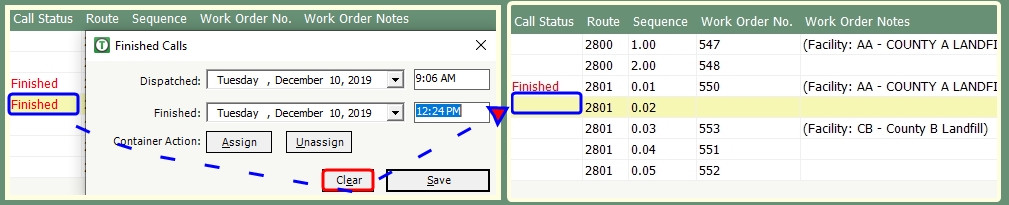
- Right Click on a Finished call.
- Click Clear.
- Finished Call Status will be removed.
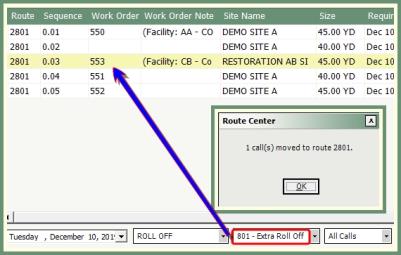
Move Call: Assigned calls can be moved to a different route on the same or different date.
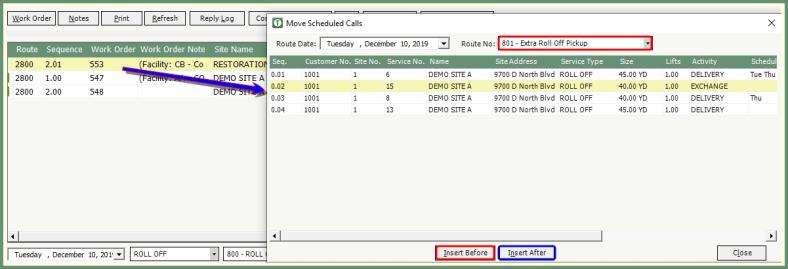
- Right click on an assigned call.
- Select Move Call.
- Select the Route Date and Route No. to move the call to.
- Select the Sequence to insert the call before or after.
- Click Insert Before or Insert After.
Message: Sends an email message to the driver or truck based on the Dispatch Setup Message Preferences for the scheduled route regarding the selected call in the assigned grid.
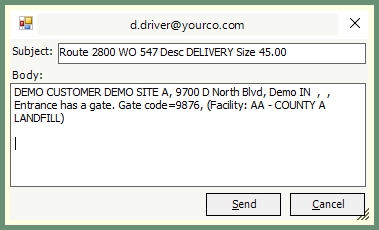
Send Details to Driver: Opens an email to the driver on the selected route. The email is pre-populated with the route, work order and service details in the subject and body.
- Add or modify text within the email as needed.
Unassign: Returns the assigned call to the unassigned grid with an unassigned status.
Delete Call: Removes the scheduled call.
- In some cases, rather than deleting the call, the scheduled call can be moved to another route or returned to an unassigned status.
Stage Call: Opens Staged Call Maintenance to add or remove the call from staged status.
Disposal Tickets: Create a New Disposal Ticket or view existing ticket numbers associated with the assigned call.
Details: Opens Call Maintenance Details. The scheduled call can be viewed and modified as needed.
Notes: Opens Add/Modify Customer Notes to view, modify or add notes for the customer for the selected call.
Work Order: Opens Call Maintenance Work Order to be previewed, printed or modified.
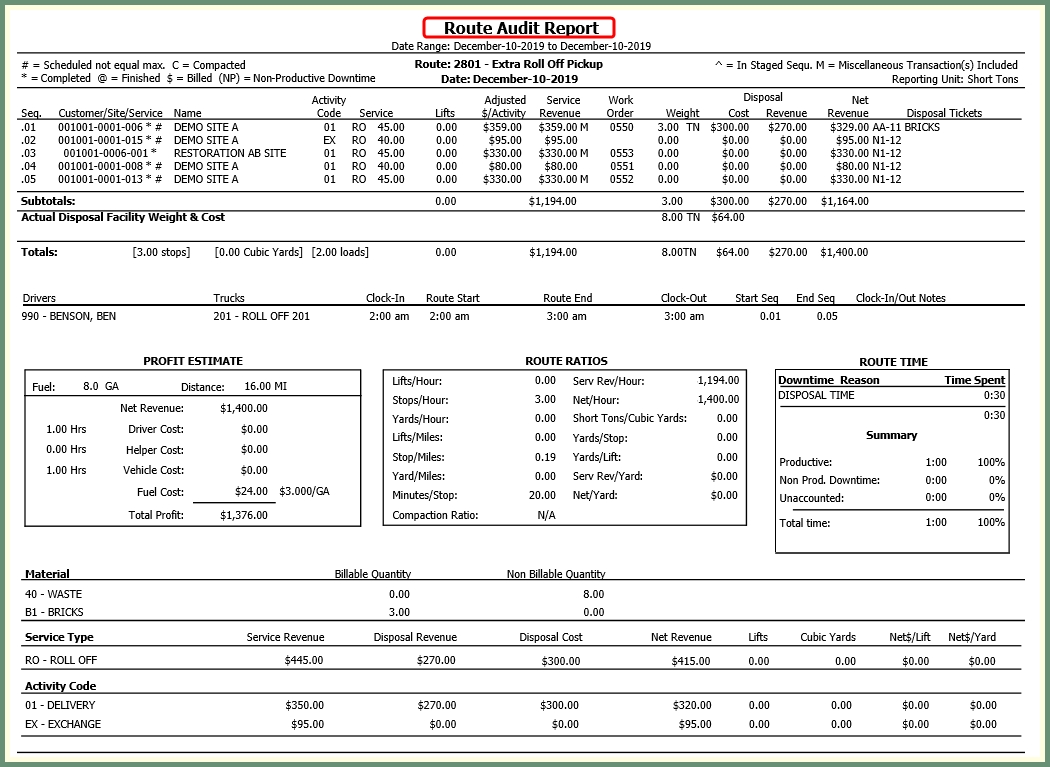
Route Audit: Opens Route Audit Report with the current routing statistics for the route associated with the selected call.
Resequence Scheduled Calls: Rearrange the current scheduled call sequence to a temporary new sequence.
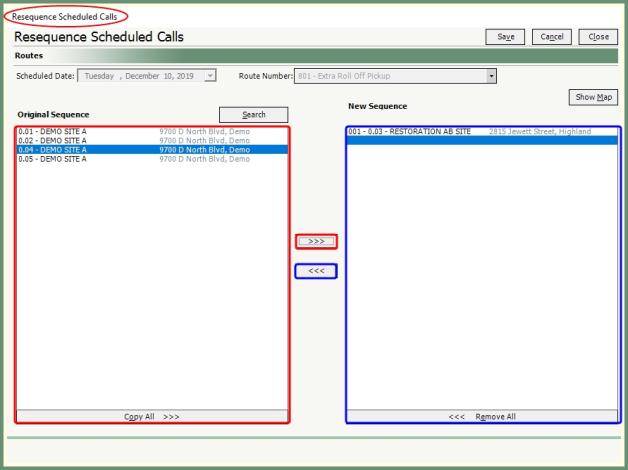
- Select a call from the Original Sequence column.
- Click the right arrow button to move the call to the New Sequence column.
- Double click will also move the call.
- Multiple selected calls can be moved at once.
- Copy All will move all remaining calls.
- Repeat until all calls in the original sequence are moved to the new sequence.
- Save.
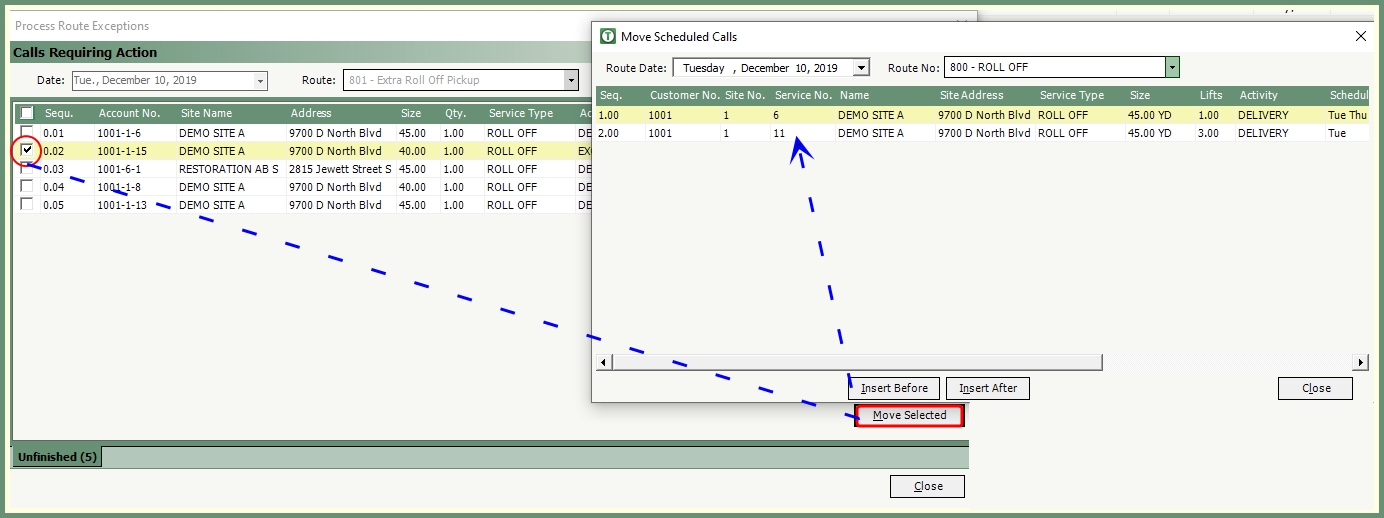
Process Route Exceptions: Opens Route Exceptions with Calls Requiring Action with the option to Move unfinished calls to another route.
View Site/Service Messages: Opens Site/Service Messages to view or modify site, service or driver messages.
Add Customer Issues: Opens New Customer Issue to add an issue to the customer associated with selected call.
View Customer Issue: Recalls existing open customer issues associated with the customer on the selected call.
View Service Details: Opens customer explorer service details associated with the selected call.
Route Assist: Haul-It Setup & Maintenance